Linksys Velop MX8502 Setup


Live Chat

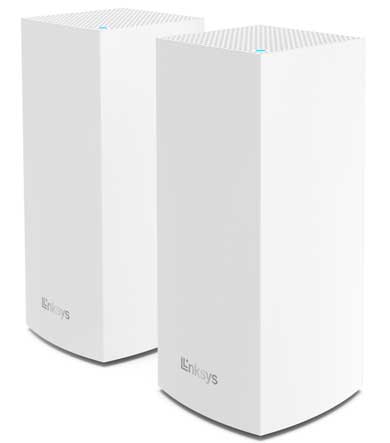
Live Chat with our experts & get real-time answers to all your queries.

Chat Now

call us

Lets Talk

Call us to discuss your Linksys issues with our experts and get the solution.

With radio frequencies of 2.4GHz, 5GHz, and 6GHz, this Linksys Velop device offers a tri-band mesh Wireless router. The Linksys Velop MX8502’s installation procedure is quite simple. Using a web browser or a Linksys application, you may quickly configure a Linksys Velop. Email, social media, & internet browsing fall within the category of low-demand activities that utilize the 2.4GHz radio band. The 5GHz band is utilized for installing and uploading data, as well as for streaming audio and video. Last but not least, 6GHz is employed for demanding activities. To learn about the complete information on the Linksys MX8502 Velop device, see the material below.

Linksys MX8502 Velop Device Top View


Linksys Velop devices have an LED at the top that displays information about the node’s status.

  • The Linksys Velop MX8502 device will start up when you see a blue light blink.
  • Your Linksys Velop device’s flawless Internet connection is demonstrated by a steady blue Light.
  • The purple LED is blinking to indicate that the configuration procedure is active.
  • After the purple Light is steady, the Linksys Velop MX8502 device is prepared for configuration.
  • Your Velop device’s red LED is blinking to indicate that it is unplugged.
  • A steady red LED indicates that the modem is not providing an internet connection.
  • A weak connection is produced by the Linksys Velop’s solid yellow Light.
Linksys MX8502 Velop

Linksys MX8502 Velop Device Back View


A USB 3.0 Port

The Velop has a USB 3.0 connector on the back that makes it simple to share USB drives over your network.

Port Of Ethernet

To connect your network’s wired devices with these gigabit ethernet ports, use an Ethernet cable. You must use these ports to establish a cable connection or add a wireless child node if you want to use more than the single network in your Linksys MX8502 device. Use the indicated internet port if the new child node has one.

Note: You can connect a high-rated CAT5e Ethernet wire to the ethernet port to gain great performance.

Electricity Port

You may quickly affix the supplied AC power adaptor to this connector.

Port Of Internet

Connect a fiber modem or broadband internet cable to this 5Gbps port using an ethernet cable. You can wirelessly add this router if you plan to use it as a minor node in your Linksys Velop mesh Wireless network.

Linksys MX8502 Velop Device Bottom View


The three buttons are located at the base of the Linksys Velop.

  • The reset button.
  • Wireless Security System Button.
  • Electricity button.

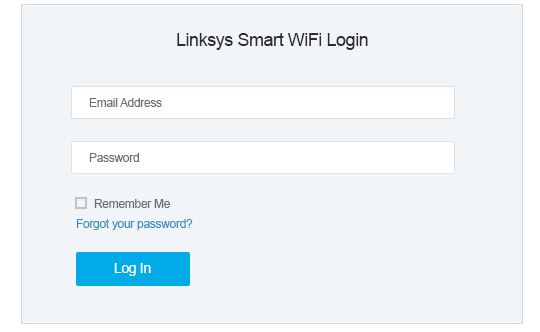
Login Details On Linksys MX8502 Velop Device


linksys smart wifi
  • A WiFi-capable device should first take.
  • Open a web browser now, and then type extender.linksys.com into the address box.
  • To continue, click the link that says “Continue to Linksys smart WiFi” or the image of a phone on your page.
  • Next, enter all of the account information on the display.
  • You will then go directly to the router dashboard after that.

As a result, using this approach will allow you to successfully log into the Linksys MX8502 Velop.

Do The Linksys Velop MX8502 Setup


The Linksys Velop MX8502 setup is made simple by installing the Linksys program on your cell phone. To perform the Velop configuration using this method, read the bottom steps.

  • Start by launching the Google Play Store on your Android smartphone and downloading the Linksys app.
  • Note: Launch the Apple Store if you are using an iOS device.
  • Search for and install the Linksys program right away.
  • Afterward, run the Linksys application & enter all the necessary details that display there.
  • Finally, take into account all of the on-screen directions

You can perform a variety of things after signing into your Linksys account:

  • Modify the WiFi network’s username and authentication passcode.
  • Easy to set up guest access.
  • Use WPS to connect the device to WiFi.
  • You can easily ban the internet with parental control.
  • Now, you may quickly test or check the internet connection’s speed.

Do The Velop MX8502 Setup Through Web Browser


If the Linksys application technique described above doesn’t work, try the Linksys Velop MX8502 setup method. Try this one approach next.

  • Then, insert the Linksys MX8502 power plug into the outlet.
  • Now, use an Ethernet cable to connect your Linksys MX8502 Velop wireless Sensors device to the modem or router modem.
  • Afterward, activate your Linksys Velop mesh WiFi setup.
  • The Linksys Velop website address should then enter in the URL bar of the WiFi-enabled device’s navigation app.
  • The Linksys MX8502 setup page then accepts all the terms and conditions before taking the user to the next step, which takes them to the wizard configuration page.
  • You must enter the 2.4GHz and 5GHz network names and WiFi security password on the following screen.
  • To change the mesh WiFi router’s password, type a new one and select “Next.”
  • To set up your Linksys Velop MX8502 right now, simply follow the instructions that appear on your device’s screen.
  • After finishing the configuring process, restart your Linksys Velop device and begin using the outstanding wireless internet connectivity service.

If you encounter any problems following the Linksys Velop MX8502 setup, use the lower solution tips to resolve them.

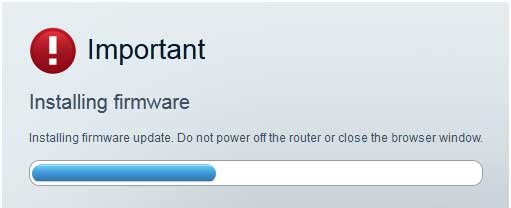
Upgrade The Firmware Of A Linksys Velop MX8502


  • Install the most recent Linksys Velop firmware on your laptop first.
  • Enter the Linksys Velop authentication server following that.
  • Next, select the option for internet connectivity.
  • Choose the firmware file you previously downloaded after that.
  • In order to fully upgrade the firmware, press the start button at the end and wait a few minutes.
Linksys Velop MX8502

Reset The Linksys Velop MX8502


  • In the beginning, search for the reset hole key.
  • Put pressure on the Linksys Velop MX8502 device’s reset hole button after that.
  • Moreover, hold a paperclip against the reset hole button for 8 to 10 seconds.
  • Last but not least, wait a short while to observe if all the LEDs will switch off.
  • As a result, the Linksys MX8502 has now been reset.

Note: You will need to repeat the Linksys Velop MX8502 setup after the Linksys MX8502 device has been reset.

After using the aforementioned troubleshooting methods on your Linksys Velop MX8502 equipment, if you continue to experience issues, please contact us by email at care@linksyswifiextender.net or by phone at +1 716-992-6371. We’ll help you resolve the Linksys Velop problem.

If you are facing any issues then please contact us, and we will be happy to help you.

Linksys Customer Service