Linksys RE4100W Setup A Complete Guide to Extend WiFi Range
Live Chat
Live Chat with our experts & get real-time answers to all your queries.
Chat Now
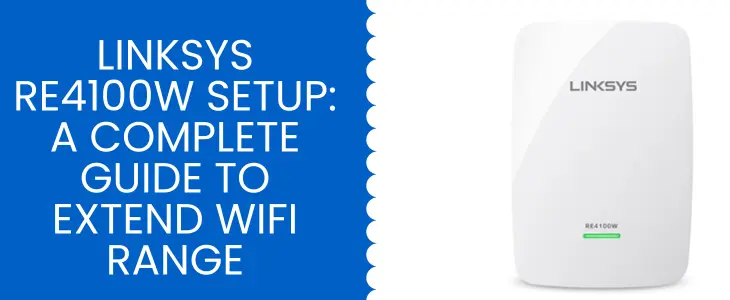
The Linksys RE4100W is a dual band WiFi range extender device. The device comes with internal antennas that extend your WiFi signals. This compact device is specifically engineered to eliminate WiFi dead zones within your home or office. By integrating the extender with your router, you can significantly boost signal coverage. Wondering how to configure the device? The Linksys RE4100W setup using a web based interface is straightforward. This guide is broken down step by step to help you understand and complete the linksys re4100w extender setup with ease.
Linksys RE4100W Step by Step Setup
The steps you should go ahead with are described here, follow them to add the device into your network.
Power Up the Linksys RE4100W
To begin the linksys re4100w setup, the first step is to power up the device. Insert the Linksys RE4100W directly into a wall socket since it is a plugin model. No separate table or surface is needed for this device placement. The extender’s compact design allows it to fit seamlessly on any wall outlet. Wait until the power LED stabilizes. It indicates the device is ready for the linksys wifi re4100w setup.
Connect to the Extender’s Network
Before you move on to configuration, form a connection between the Linksys RE4100W extender and your computer or laptop. You can do this using an Ethernet cable for a wired setup or connect wirelessly via WiFi settings. This is essential to proceed with the linksys wifi re4100w extender setup.
Access the Admin Account
Accessing the admin panel is required for web based linksys re4100w extender setup. Open a web browser and follow the steps listed below:
- http://extender.linksys.com web address is to be typed in the browser’s URL.
- Alternatively, use the default IP address: 192.168.1.1.
- As the access granted you need to choose for the “Set up Range Extender” option from the menu.
- Device model “RE4100W” from the displayed list is to be choosed next.
- Enter “admin” in the username field and type “password” in the password field.
- Click Login to access the dashboard for the linksys wifi re4100w setup.
Configure the Range Extender
You’re now ready to configure the device. Complete the linksys wifi re4100w extender setup by moving ahead with these steps:
- First, create a secure password for your admin account.
- Connect the Linksys RE4100W to your router’s WiFi network using the correct login credentials.
- Assign a new SSID for the extended network after the link is complete. You can use the same or different name from your main router.
- Set a secure password for the extender network to keep your WiFi protected.
- Check for firmware updates in the admin panel. An outdated firmware version may result in connectivity issues, so update it if needed.
Once the above configurations are completed, you’re almost done with the linksys re4100w setup.
Finish the Setup Process
Finalize the linksys re4100w extender setup by clicking on the Apply button. Make sure all the settings you’ve made are correct. Be sure to save your new admin password and extender network credentials.
Relocate the Device
To get the best performance from your Linksys RE4100W, it’s important to relocate the device wisely. Here are the key placement tips for an optimal linksys wifi re4100w setup:
- Avoid placing the extender behind thick concrete walls or in room corners.
- Keep the device away from heavy metal objects.
- Not to put it close to microwave ovens, cordless phones, or other RF devices.
- Ensure the extender remains within the range of your main WiFi router.
- Place the extender near areas where you were previously experiencing weak signals or dead zones.
- Correct positioning plays a crucial role in the success of your linksys re4100w setup and ongoing performance.
Test the Network
Once you’ve completed the linksys wifi re4100w extender setup, it’s time to test your network. Use a smartphone or laptop to connect to the new extended WiFi network using the new SSID and password. Browse the internet, stream videos, and move across different areas of your home or office to verify signal strength and speed. This final step ensures your linksys re4100w setup has been successful.
Linksys RE4100W Troubleshooting Guide
Even though the Linksys RE4100W WiFi range extender is a high quality networking device, occasional issues may occur. If you face problems during or after the linksys wifi re4100w setup, use the troubleshooting tips below:
- Ethernet and power cables should be securely plugged in, ensure it first.
- Sometimes, rebooting your Linksys RE4100W can resolve minor glitches.
- for a stronger signal, put the extender nearer to your router.
- Keep other electronic devices and signal blocking objects away from the extender.
- If extender.linksys.com doesn’t work, try using the IP address 192.168.1.1.
- Make sure your device is connected to the extender’s network if using WiFi.
- Navigate to the firmware section in the admin panel and install any available updates.
- As a last resort, press the reset button on the device for 10 seconds to restore factory defaults. You can then begin the linksys re4100w extender setup process again from scratch.
Final Thoughts
Linksys wifi re4100w setup is designed simply, whether you’re a tech savvy user or a beginner, you can do it by yourself. The linksys re4100w extender setup takes just a few steps. It delivers immediate improvements in your WiFi coverage. Always follow the official steps as outlined above or in the Linksys user manual for the linksys re4100w setup. By completing the linksys wifi re4100w extender setup, you’ll enjoy seamless internet access in every corner of your space. No more buffering or dropped connections will last in your network.
If you ever face an issue then apply the troubleshooting suggestions, or reset and repeat the linksys re4100w setup. Yet if required then call our team for help. Contact number is mentioned below. They can guide you with the setup process and troubleshooting the issue as well. Don’t wait, just call!</span
